VPN Accounts
VPN accounts are offered for faculty members to connect to the Knight Foundation School of Computing and Information Sciences department network and work remotely. In some special cases, graduate students who show a need for a VPN account may be granted one with prior approval by their sponsoring faculty. If you would like to request a VPN account, send a request to request@cis.fiu.edu
[su_tabs]
[su_tab title=”Windows NT” disabled=”no” anchor=”” url=”” target=”blank” class=””]
Windows NT
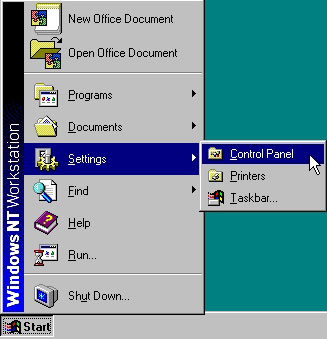
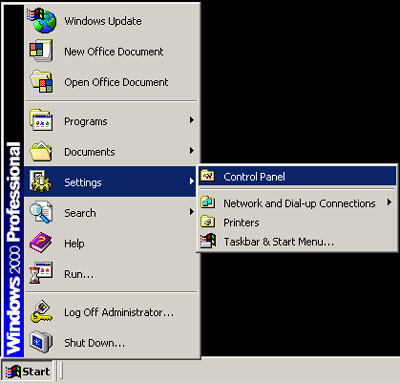
Click on “Start”, “Settings”, and select “Control Panel”
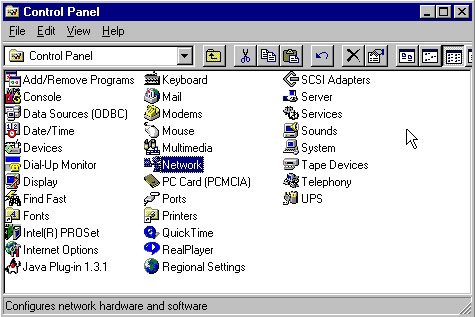
Open up “Network”
Select the “Protocols” tab and then click on “Add…”
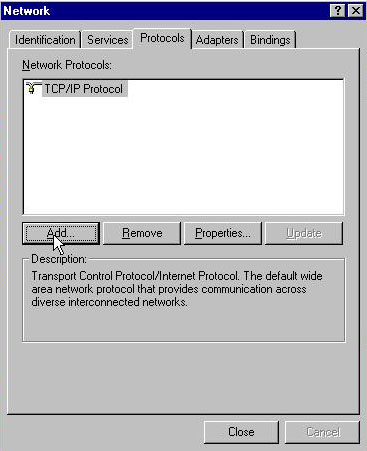
From the list select “Point to Point Tunneling Protocol” then click on “OK”

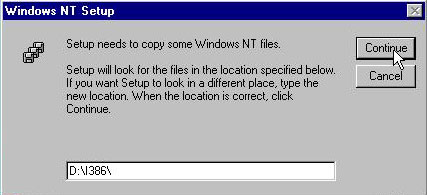
Insert the Windows NT 4.0 Workstation CD in the drive and in the text box type “<cd-rom drive>:\i386” then click on “Continue”
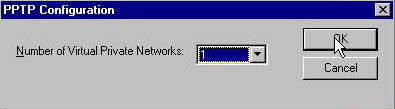
From the drop down box in the “PPTP Configuration” screen select “1” for “Number of Virtual Private Networks” then click on “OK”
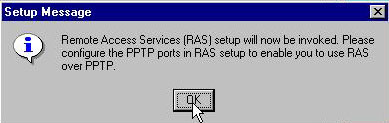
In the “Setup Message” dialog click on “OK”
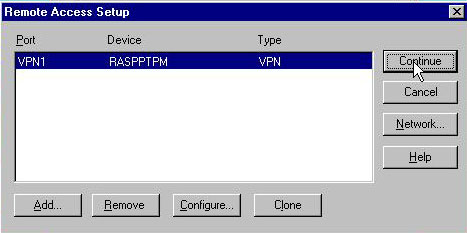
In the “Remote Access Setup” click on “Continue”
In the “Network” click on “Close”

Restart the machine

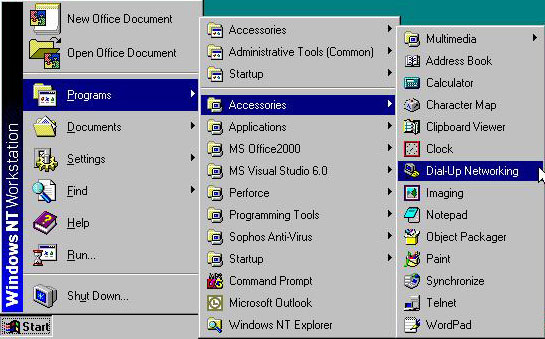
When the machine is back up click on “Start”, “Programs”, “Accessories”, then select “Dial-up Networking”
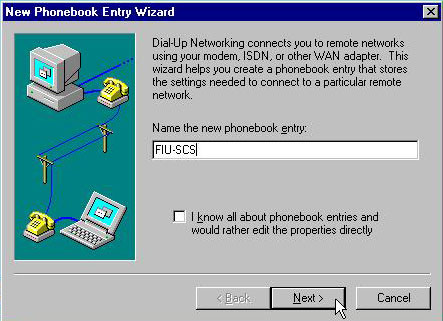
If you didn’t have any entries in the phone book click on “OK” otherwise click on “New…”

Type in the name that you want to call the connection then click on “Next”
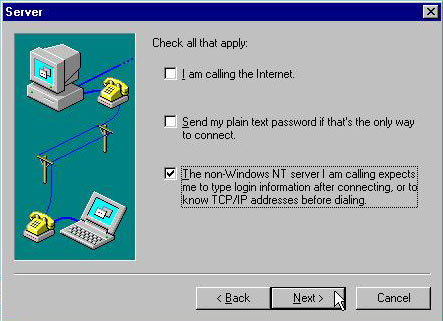
Select “The non-Windows NT server I am calling expects me to type login information after connecting, or to know TCP/IP address before dialing” and click on “Next”
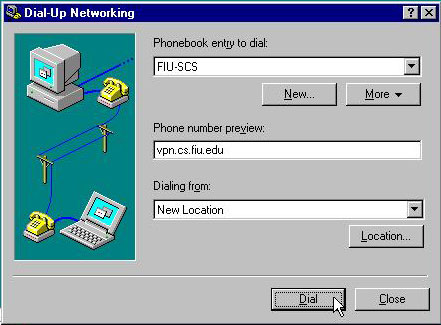
Enter “vpn.cis.fiu.edu” in the text box for the phone number and click on “Next”

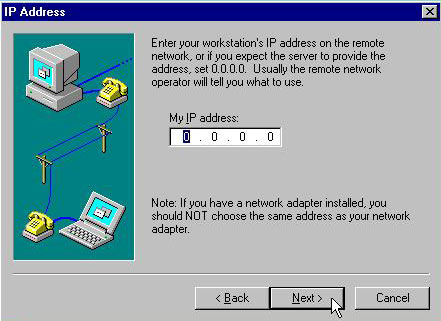
Click on “Next” in the “IP Address” screen without changing anything
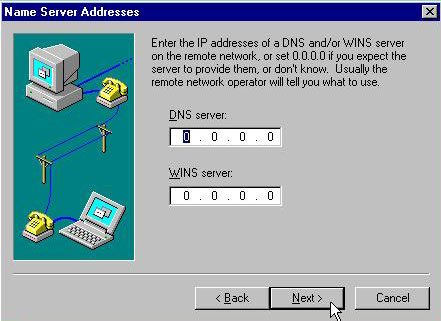
Click on “Next” in the “Name Server Addresses” screen without changing anything
Click on “Finish”

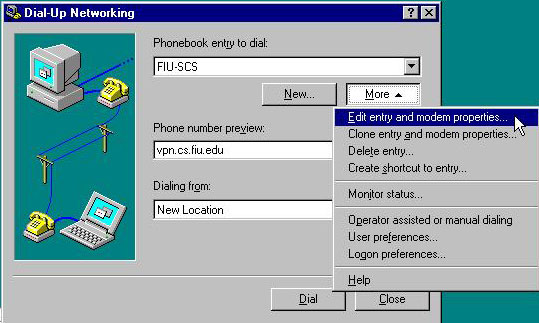
In the “Dial-UP Networking” dialog box click on “More” and select “Edit entry and modem properties…”
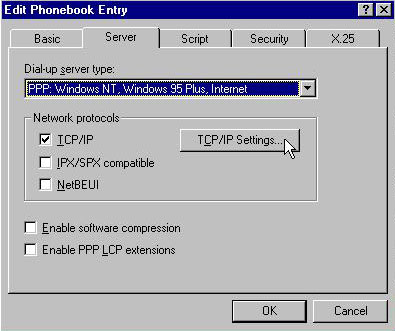
Select the “Server” tab and then click on the “TCP/IP Setting”
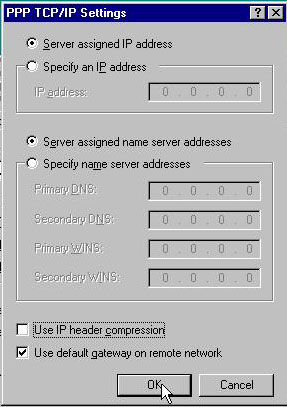
Uncheck “Use IP header compression” then click on “OK”
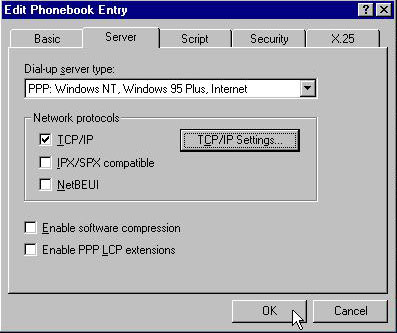
In the “Edit Phonebook Entry” click on “OK”
Click on “Dial”
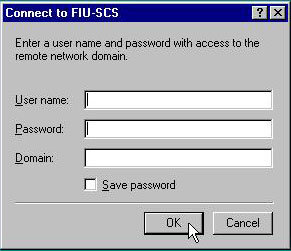
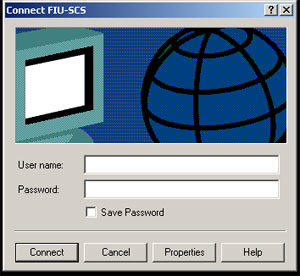
Enter your assigned user name and password with Leaving the “Domain” text box empty and then click on “OK”
[/su_tab]
[su_tab title=”Windows 2000″ disabled=”no” anchor=”” url=”” target=”blank” class=””]
Windows 2000
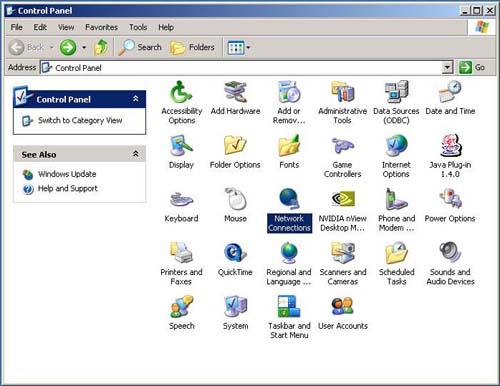
Click on “Start”, “Settings”, and select “Control Panel”
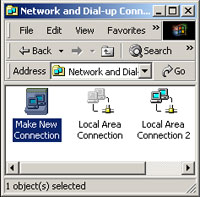
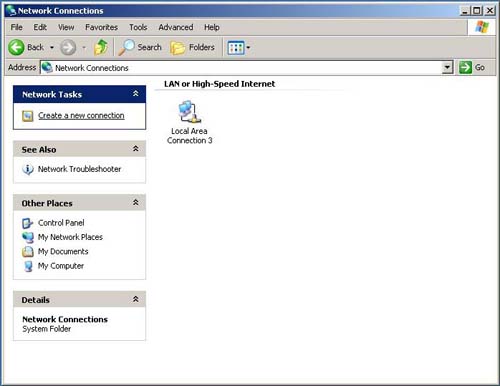
Open up “Network Connections”

Open up “Make New Connection” then click on “Next”
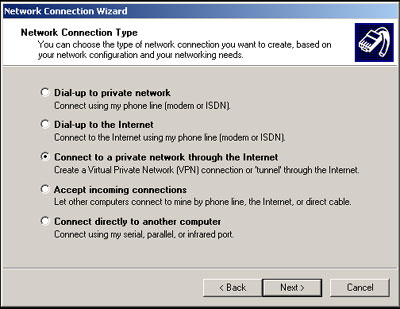
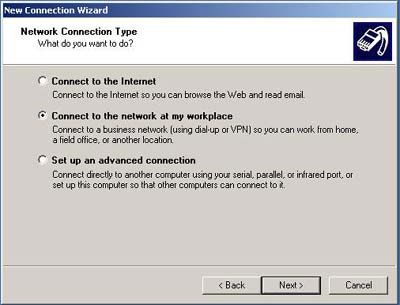
Select “Connect to a private network through the Internet” and click on “Next”
Enter “vpn.cis.fiu.edu” in the text box and click on “Next”

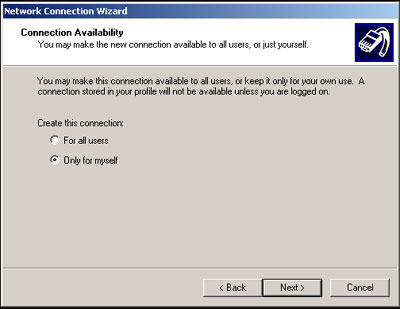
Select whether you want to create the connection for all users or just your self then click on “Next”
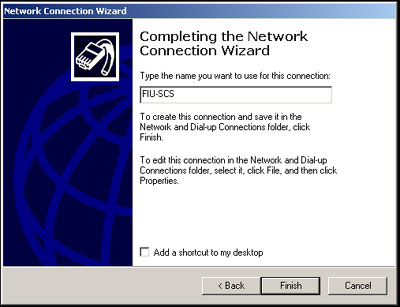
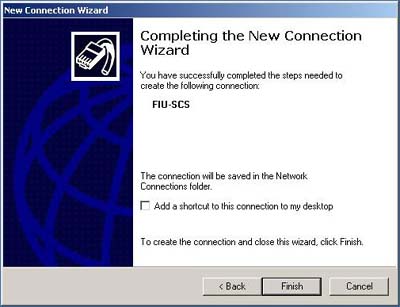
Enter the name that you want to call the connection and click on “Finish”
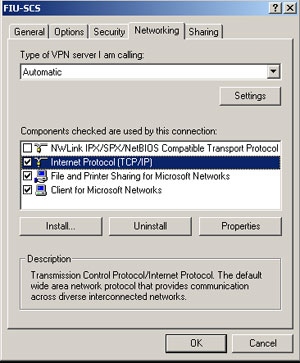
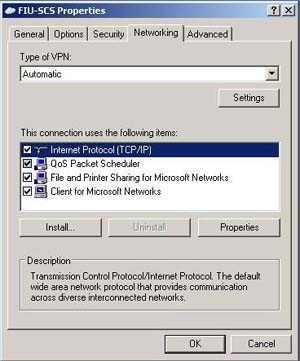
Click on “Properties” and select the “Networking” tab

Uncheck everything except for “Internet Protocol (TCP/IP)” then click on OK
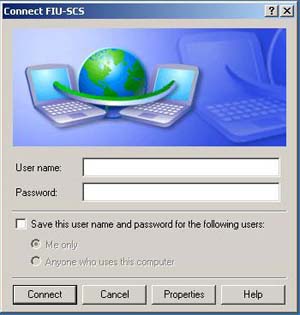
When connecting enter your assigned username and password and click on “Connect”
[/su_tab]
[su_tab title=”Windows XP” disabled=”no” anchor=”” url=”” target=”blank” class=””]
Windows XP Professional
Click on “Start”, “Settings”, and select “Control Panel”

Open up “Network Connections”
Open up “Make New Connection” then click on “Next”
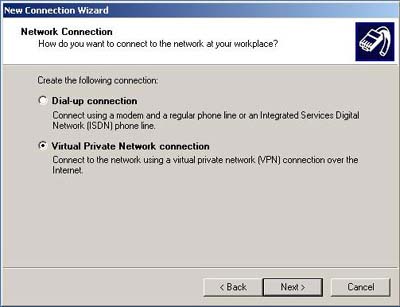
Select “Connect to the network at my workplace” and click on “Next”
Select “Virtual Private Network connection” and click on “Next”
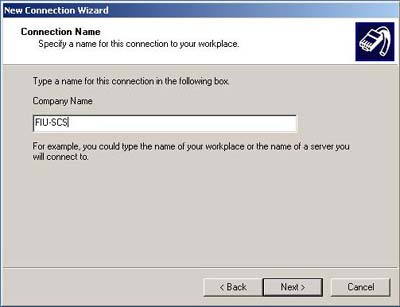
Enter the name that you want to call the connection and click on “Next”
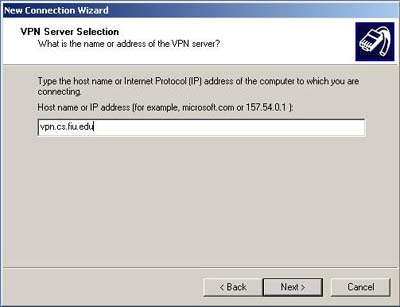
Enter “vpn.cis.fiu.edu” in the text box and click on “Next”
Select whether you want to create the connection for anyone’s use or just your use then click on “Next”
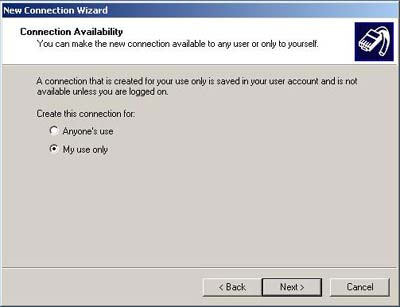
Click on “Finish”
Click on “Properties” and select the “Networking” tab

Uncheck everything except for “Internet Protocol (TCP/IP)” then click on OK
When connecting enter your assigned username and password and click on “Connect”
[/su_tab]
[su_tab title=”Windows 7″ disabled=”no” anchor=”” url=”” target=”blank” class=””]
Windows 7
-
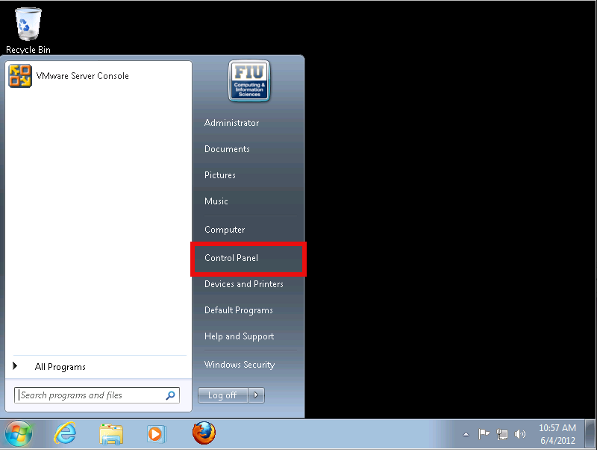
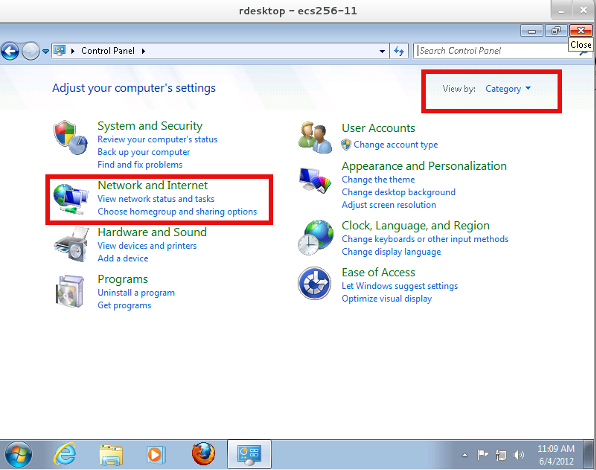
- Click on Start and go to the Control Panel
-
- Click on View by and select the items to display as a Category
-
-
- Click on the Network and Internet title
-
-
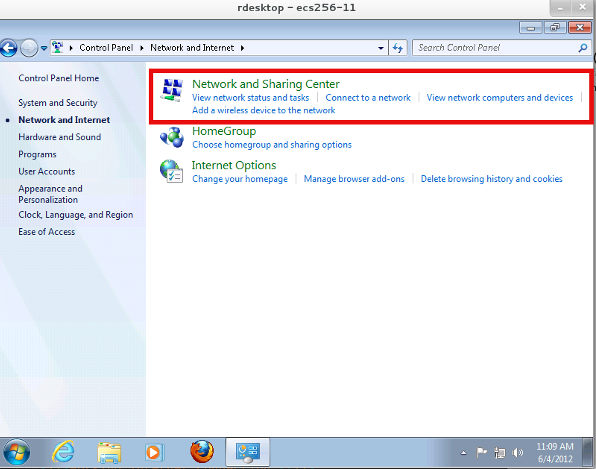
- Click on Network and Sharing Center
-
- Click on Connect to a network

-
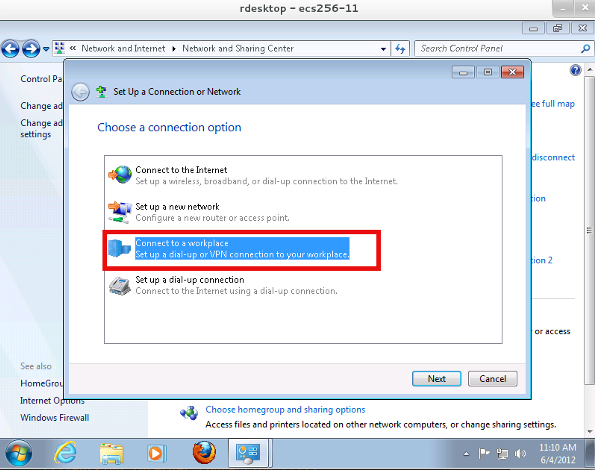
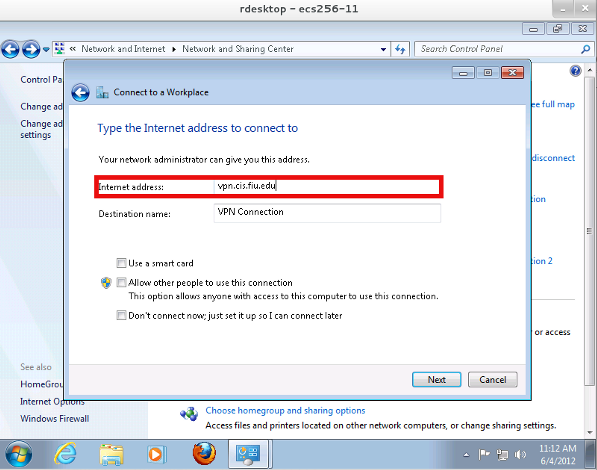
- Click on Connect to a workplace
-
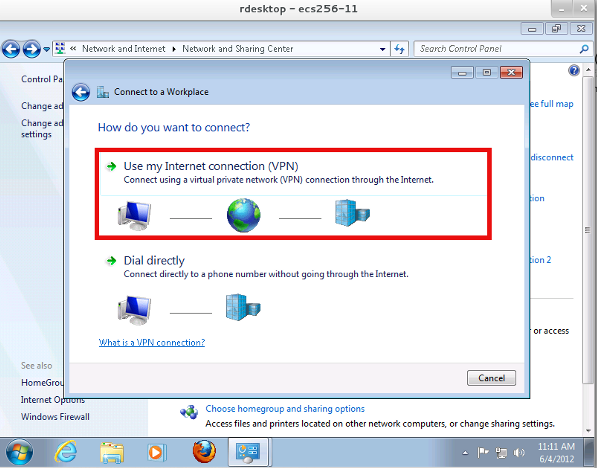
- Click on Use my Internet Connection (VPN)
-
- Enter vpn.cis.fiu.edu under the Internet Address field
-
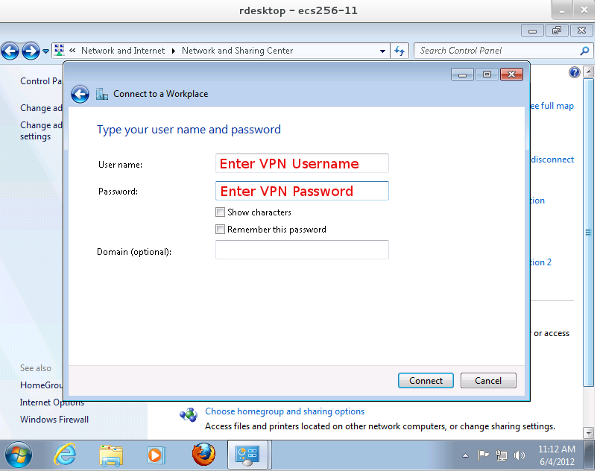
- Enter your username/password for your VPN account
- You must already have a VPN account. Your CS(.fiu.edu) email username/password is not the same credentials used to log in. If you need a account please email request.cs.fiu.edu
- Enter your username/password for your VPN account
-
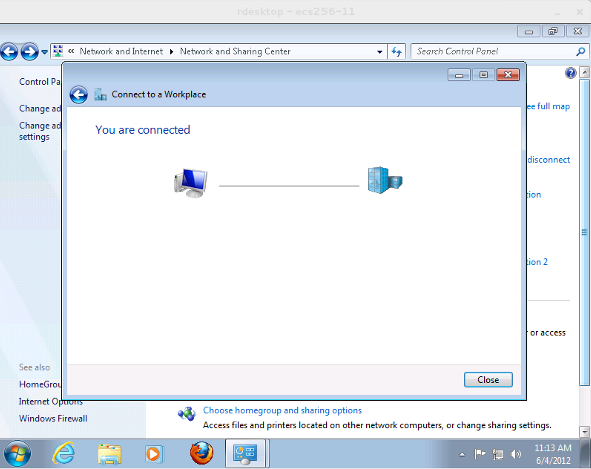
- Finish!
If you encounter any problems send an email to request@cs.fiu.edu OR drop by CASE room 258
[/su_tab]
[su_tab title=”Windows 10″ disabled=”no” anchor=”” url=”” target=”blank” class=””]
Windows 10
Click on Start and go to the Control Panel
Click on View by and select the items to display as a Category
- Click on the Network and Internet title
Click on Network and Sharing Center
Click on Set up a new connection or network
Click on Connect to a workplace
Click on Use my Internet Connection (VPN)
Enter vpn.cis.fiu.edu under the Internet Address field
Go back to Network and Sharing Center
Click on Change adapter settings
Right click on the newly created VPN Connection and click Properties
Navigate to the Security tab then select Point to Point Tunneling Protocol (PPTP) then click OK
Click on the network icon on the taskbar and click Connect on the VPN connection
Enter you VPN Credentials
You are now connected!!
[/su_tab]
[su_tab title=”Linux” disabled=”no” anchor=”” url=”” target=”blank” class=””]
Linux VPN Client setup
Prequisites
-
- VPN registration (VPN registration page)
- Kernel support for MPPE protocol (Microsoft Point-to-Point Encryption)
- PPP daemon support for MS-CHAPv2 (Microsoft Challenge Handshake Authentication Protocol version 2) and MPPE
- PPTP software (Point-to-Point Tunneling Protocol)
- Working Internet connection
- We cannot provide that, you must setup it yourself (Please note that 33Kbps modem connection will work … but SLOW, MPPE encryption adds significient overhead ..)
- Precompiled (for RedHat 7.*) pptp-linux and ppp rpms are available at: pptpclient.sourceforge.net
- Source rpms for above are available at: pptpclient.sourceforge.net
- Patches applied to the standard RedHat packages are here: INSERT
- A tarball archive of a patched pppd source as well as the kernel modules is available at: fiu-scs
Note: You only need this tarball if you are not running redhat or debian or if you want to compile and install the packages you need from source.
Setup
Once you’ve downloaded all above software proceed (as root on your machine) to:
ppptp
[root@lisa root]# /usr/sbin/pptp-command
1.) start
2.) stop
3.) setup
4.) quit
What task would you like to do?: 3
1.) Manage CHAP secrets
2.) Manage PAP secrets
3.) List PPTP Tunnels
4.) Add a NEW PPTP Tunnel
5.) Delete a PPTP Tunnel
6.) Configure resolv.conf
7.) Select a default tunnel
8.) Quit
?: 1
1.) List CHAP secrets
2.) Add a New CHAP secret
3.) Delete a CHAP secret
4.) Quit
?: 2
Add a NEW CHAP secret.
NOTE: Any backslashes (\) must be doubled (\\).
Local Name:

This is the 'local' identifier for CHAP authentication.
NOTE: If the server is a Windows NT machine, the local name
     should be your Windows NT username including domain.
     For example:

     domain\\username
Local Name: username

Remote Name:

This is the 'remote' identifier for CHAP authentication.
In most cases, this can be left as the default. It must be set if you have multiple CHAP secrets with the same local name and different passwords. Just press ENTER to keep the default.

Remote Name [PPTP]:*

Password:

This is the password or CHAP secret for the account specified. The password will not be echoed.

Password: ************* (your NICE password)
Adding secret username * ***********

1.) List CHAP secrets
2.) Add a New CHAP secret
3.) Delete a CHAP secret
4.) Quit
?: 4
1.) Manage CHAP secrets
2.) Manage PAP secrets
3.) List PPTP Tunnels
4.) Add a NEW PPTP Tunnel
5.) Delete a PPTP Tunnel
6.) Configure resolv.conf
7.) Select a default tunnel
8.) Quit
?: 4

Add a NEW PPTP Tunnel.

1.) Other
Which configuration would you like to use?: 1
Tunnel Name: FIUCIS
Server IP: vpn.cis.fiu.edu
What route(s) would you like to add when the tunnel comes up?
This is usually a route to your internal network behind the PPTP server.
You can use TUNNEL_DEV and DEF_GW as in /etc/pptp.d/ config file
TUNNEL_DEV is replaced by the device of the tunnel interface.
DEF_GW is replaced by the existing default gateway.
The syntax to use is the same as the route(8) command.
Enter a blank line to stop.
route: add -host vpn.cis.fiu.edu gw DEF_GW
NOTE: replace DEF_GW above
with the ip address of your local gateway
route: add -net 131.94.0.0 netmask 255.255.0.0 ppp0
route:
Local Name and Remote Name should match a configured CHAP or PAP secret.
Local Name is probably your NT domain\username.
NOTE: Any backslashes (\) must be doubled (\\).

Local Name: username
Remote Name [PPTP]: *
Adding FIUCIS - vpn.cis.fiu.edu - username - PPTP
Added tunnel  FIUCIS

1.) Manage CHAP secrets
2.) Manage PAP secrets
3.) List PPTP Tunnels
4.) Add a NEW PPTP Tunnel
5.) Delete a PPTP Tunnel
6.) Configure resolv.conf
7.) Select a default tunnel
8.) Quit
?: 7
1.) FIUCIS
2.) cancel
Which tunnel do you want to be the default?: 1
1.) Manage CHAP secrets
2.) Manage PAP secrets
3.) List PPTP Tunnels
4.) Add a NEW PPTP Tunnel
5.) Delete a PPTP Tunnel
6.) Configure resolv.conf
7.) Select a default tunnel
8.) Quit
?: 8
[root@lisa root]#
Note: Above configuration encrypts and routes through the tunnel ONLY your communication channels to FIU networks. All other traffic from your machines goes unencrypted over your internet connection to the provider. Your NICE password is stored in CLEARTEXT in /etc/ppp/chap-secrets. (This could be a security problem on multiuser machines…)
Test it
Run:
[root@lisa root]# /usr/sbin/pptp-command start
You should see the output similar to the following:
Route: add -host vpn.cis.fiu.edu gw 64.129.118.41 added
Route: add -net 131.94.0.0 netmask 255.255.0.0 ppp0 added
All routes added.
Tunnel FIUCIS is active on ppp0.  IP Address: 131.94.127.*
To verify that your tunnel is running you may try:
[root@lisa root]# traceroute www.cis.fiu.edu
traceroute to leopard.cis.fiu.edu (131.94.125.219), 30 hops max, 38 byte packets
1  vpn.cis.fiu.edu (131.94.127.129)  68.169 ms  70.184 ms  80.097 ms
2  sagwa.cis.fiu.edu (131.94.133.5)  80.163 ms  79.496 ms  69.764 ms
3  leopard.cis.fiu.edu (131.94.125.219)  84.726 ms  79.591 ms  79.936 ms
[root@lisa root]#
Your first hop on the route should be named INSERT To stop the tunnel use:
[root@lisa root]# /usr/sbin/pptp-command stop
Sending HUP signal to PPTP processes...
[root@lisa root]#
To see the tunnel state use:
[root@lisa root]# /usr/sbin/pptp-command status
There is probably not a pptp tunnel up
[root@lisa root]#
(As you may see even on the above output the detection is somehow flaky …)
Note: pptp-command is not very clever: watchout for multiple starting of the tunnel …
Troubleshooting
- Are you registered?
- Have you supplied correct VPN userid and password ?
- Is your underlying internet connection working ?
- Debug your connection attempts:
- Add debug keyword in /etc/ppp/options.pptp
- Edit your
/etc/syslog.conf to contain line:
*.* /var/log/messages - restart syslog:
/sbin/service syslog restart - Watch the debug output:
tail -f /var/log/messages
during subsequent attempts
- Consult the documentation:
https://pptpclient.sourceforge.net. - What works over the tunnel?: Everything using IP should work – let me know about any exceptions you find ..
[/su_tab]
[su_tab title=”Mac OS X” disabled=”no” anchor=”” url=”” target=”blank” class=””]
Mac OS
MacOS users must use L2TP over IPSEC to connect to our VPN. As there are special security requirements, instructions are sent on how to connect when a VPN account is requested. Please contact request@cs.fiu.edu if you already have a VPN account and need MacOS connection instructions.
[/su_tab]
[/su_tabs]